The stepchild of #sarahsdailydiy on Instagram

Month: January, 2014

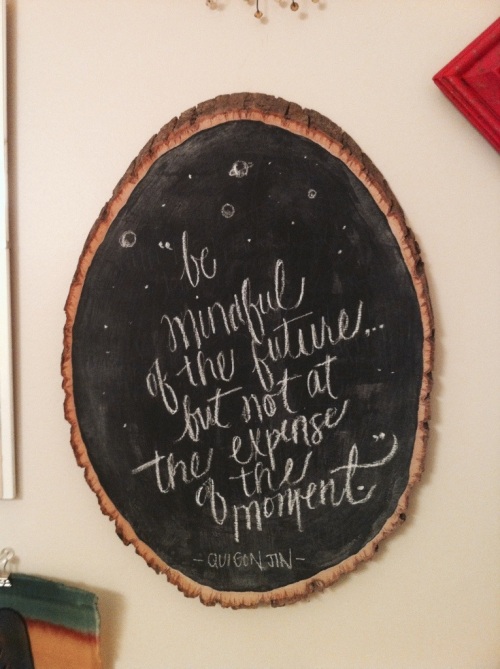
A Rustic Chalkboard

20140131-161839.jpg

This project is quick with long lasting fun. I have made some of these as wedding presents for friends, and they’ve loved them.

What you’ll need:
• bracket hardware
• a hammer
• stump slice
• chalkboard paint

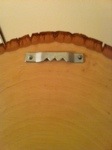
You can find a sliced stump like the one I used at Hobby Lobby in their wooden crafts section, for just a few dollars. Before you paint, attach the bracket hardware to the back of the wood, near the end you choose for the top and in the center (It doesn’t matter if it’s extremely precise because the wood isn’t a perfect circle anyway 😉 ).

20140131-161849.jpg

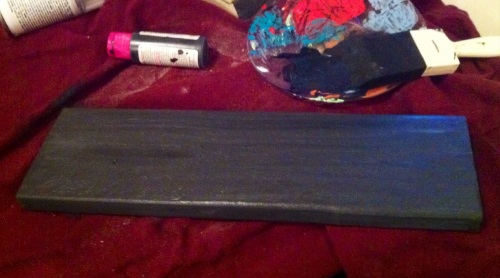
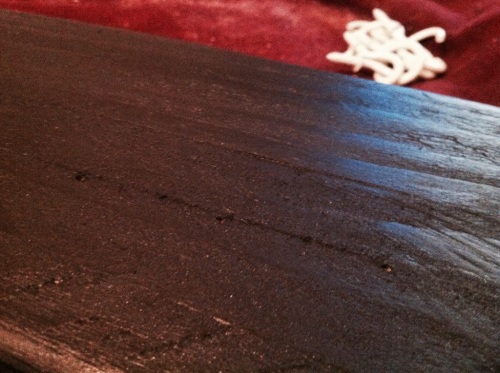
To apply the chalkboard paint, I used a foam brush to get the flattest and most even coat. Sometimes brushes leave streak marks and I didn’t want a bumpy surface for my chalkboard.

I liked leaving a little bit of wood on the edge, but you could paint to the edge if you wanted.

Once the paint is dry, use a chalk pencil or a regular piece of chalkboard chalk to write quotes or draw pictures to your hearts content.

A Helpful Hint: when erasing, start with a damp cloth, then dry. If you use a paper towel, the wood texture tears it up and leaves little dusty pieces all over.

Happy doodling!
Sarah

DIY Jewelry Display

I received a few new beautiful necklaces for Christmas and I really wanted to have a pretty way to display them- for cheap 😉

I used all items I already had, so this project cost me $0! Yay!

What you’ll need:
• a piece of wood (you could use anything you already have on hand, I used a 1×4″ piece about 12″ long)
• sandpaper
• 12 white hooks (you could also use thumb tacks)
• paint, paintbrush
• picture frame brackets and nails
• hammer
• drill and tiny drill bit (if you’re using hooks)

First thing you want to do is measure the center of your wood piece. Mark it, and then divide each half in half. So mark your two centers. These will be where you attach your brackets. You need two so it doesn’t go all uneven when you hang your necklace on one side.

20140122-224250.jpg

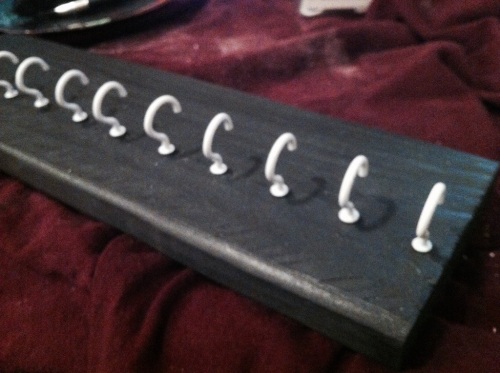
I had my wood already sanded and painted, but if you wanted, it would probably be easier to paint it after you drill your holes. So with my wood ready, I took my tiniest drill bit and drilled holes in a straight line all along my wood exactly 1″ apart (mark them with a pencil first! 🙂 ). Drilling makes it much easier to twist the hooks in.

20140122-223913.jpg

20140122-223929.jpg

20140122-224016.jpg

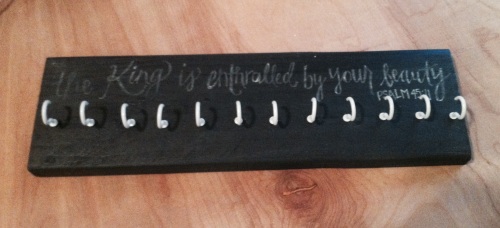
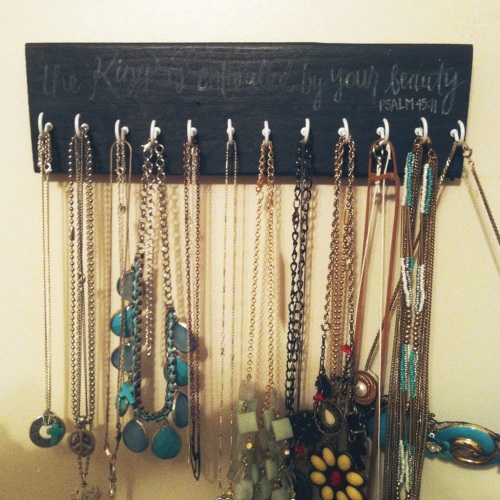
I designed this display with room at the top to write a quote. I chose Psalm 45:11 and penciled it out first to make sure it would fit like I wanted. Then I went over it in a white chalk pencil. Even though I didn’t paint it in chalkboard paint, you could definitely do that!

Once you’ve got your brackets on, holes drilled, wood sanded and painted, hooks in, and (if you want) quote written, you’re ready to hang it up! Display your favorite necklaces with pride on your new jewelry display!

20140122-224055.jpg
20140122-224238.jpg

Stay beautiful!
Sarah

DIY Puppy Booties

If you’re a human being and you live in the Midwest you know what I mean when I say it’s so cold outside right now that you literally get an instant brain freeze just from breathing.

It’s no different for my pup. But she’s gotta walk in it without boots. And today, she’d finally had enough. She picks up her tiny little paws and starts to cry because it’s so cold! I tried everything, putting a cloth outside, putting a potty pad inside, until my hubs just said- why don’t we make her boots of some sort! We’d looked at dog boots in the past, but they are so expensive! And it wasn’t this cold then.

So in dire need, I’ll show you how I made these little puppy boots.

20140122-162951.jpg

20140122-143651.jpg

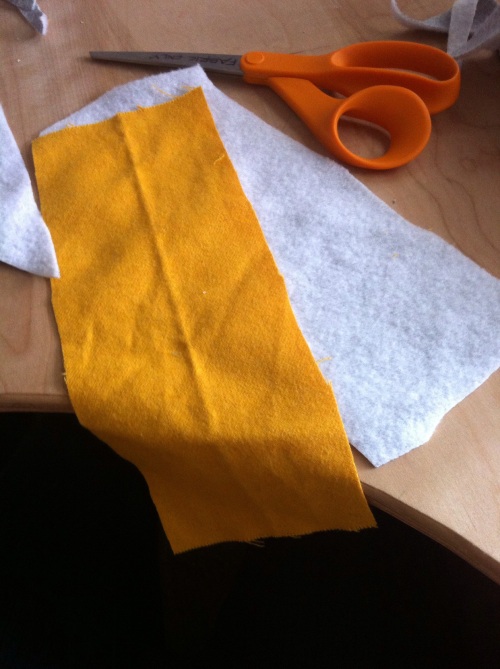
First, find the most water-resistant fabric you have. I used a scrap of old yellow wool blend. Since it wasn’t very thick, I lined them with fleece.

20140122-143802.jpg

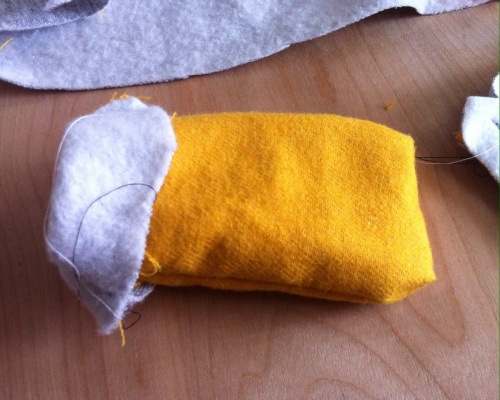
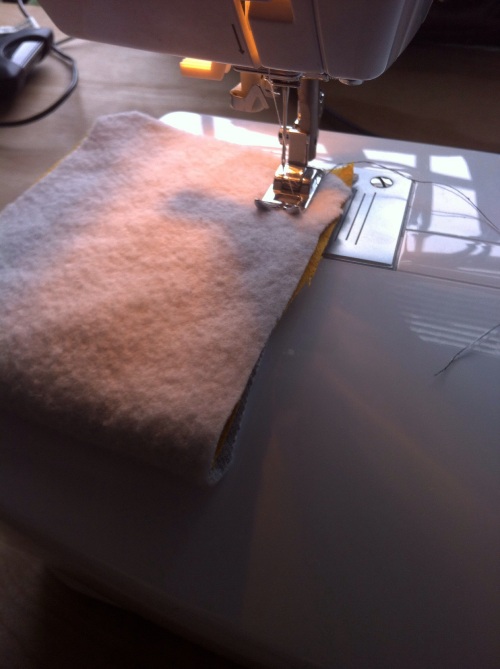
To line boots, take your two pieces of fabric and fold in half; the fold along the bottom will be the base. Sew with your liner fabric on the outside, and your outside fabric facing the inside. Leave enough room for a seam. After I measured my dogs paws, I figured I’d need about four inches of fabric. I cut 4.5″ wide and about 8″ long. If your dog has bigger feet, you can make these as big as you need.

20140122-143926.jpg

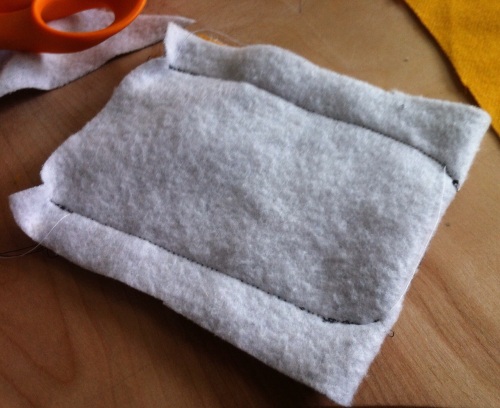
I stitched the two pieces together to create the little bag shape. I rounded the bottom a little bit to better fit her paw.

20140122-143704.jpg

I decided to just leave the tops raw, but if you wanted you could hem them or fold them over and hem them down.

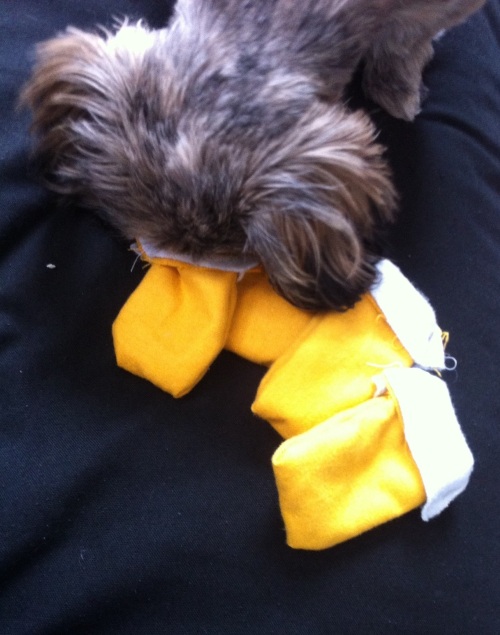
Then I flipped the booties inside out so the wool was on the outside and the fleece was inside. For sake of time, and lack of a better idea at the time, I used four hair-rubber-bands to cinch the tops around her legs. Not too tight, but enough so that she couldn’t shake them off right away.

It was quite a sight to see her try to walk… She looked a little like a new duckling with the yellow flappy feet! But I was glad to see that the boots stayed on long enough for her to not freeze her toes while she did her business. They did fall off as she ran back to the door- but she didn’t freeze!

Now she just wants to chew them up, but I think we’ll definitely use them again!

Stay warm!
Sarah

20140122-162914.jpg

20140122-162932.jpg

How To Host a Closet Swap

Image

The after Christmas dull-ness creeps up slowly in January. But it hits us all hard in February. Gray, chilly days, with spring break still a long way off. Here’s an idea to brighten the gray months!

Host a Closet Swap! 

What is a closet swap? It’s basically a party where a bunch of your friends come over with their old clothes and junk, and you pull out a bunch of your old clothes and junk, and you all trade. Anything that doesn’t get taken gets donated to charity! So fun, and so free!

Step 1:

Clean out your closets! You just got some nice new stuff for Christmas, why don’t you get rid of that weird shirt you never wear. It’s nice, just not the right shape for your body. So put it in the Swap Pile! Those candles you got on clearance but never used? Swap Pile! Really anything you feel like you would normally donate to Goodwill, start making a pile for your party!

Step 2:

Tell your friends to do the same! Send out an invitation, even one through Facebook message, and let them know whats up. This way, they can start to think about things they might not want anymore, and start a Swap Pile of their own.

Step 3: 

Pick a pretty open room for your party. People are going to be bringing lots of things, and you’ll want a place to lay everything out nicely. Whether its on the couch or the dining table, just make sure that its not just in a clump on the floor- People will want to see what others have! Also, have a room available with a mirror for guests to try things on, such as a small bathroom. 

If you want to, prepare some light snacks and/or drinks. Ask your friends to bring something if you want to have a pitch-in!

Step 4: 

Count your guests, and give everyone a piece of paper with a number on it. This step is similar to a White Elephant Gift Exchange. Guests will go in order of their number, and each guest will pick one item. After the first item has been picked, do the numbers again, but in reverse order (I.E. 1 through 10, 1 would go first in the first round, and 10 would go first in the second round, immediately following her first turn). Do this as many times as you want to, but its not necessary for the whole time. In the past, when I’ve hosted, we’ve used this number technique for the first two rounds, then every body has two items they really like. After the first two rounds, it becomes a free-for-all grab. Pick it up, try it on, keep it, or toss it back. Be open to trading with other girls too!

Step 5 (optional): 

This is just an extra for fun! When each guest picks an item, make her put it on! Jeans? Under her skirt. Dress? Over everything. Necklace? Easy. Shoes? Go for it! This makes it fun to see what everyone has! And it makes sure that no one else can grab that item. Make sure to take pictures of each guest in their final multi-layered wardrobe!

If you don’t want to do this, just have designated piles of grabbed items for each guest. 


After things have settled down, and theres a small pile of items left that no one really wants, put those items in a box or bag and donate them to a local charity or Goodwill. 

Hosting a closet swap is a fun way to gain a few new-to-you items for your closet, while not spending a penny. And it gives you and your girlfriends an excuse to get together and do something besides paint your nails or watch another movie 🙂


I’d love to hear your stories! Have fun swapping!

Sarah

Odds & Ends Necklace

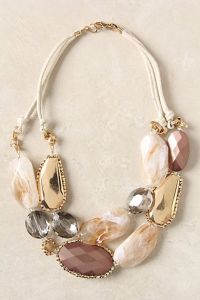
I came across this really interesting looking necklace on Pinterest today, and decided to try to make a similar one for myself with things I already had in my jewelry making box.

ff34c6d689e27f6cfcb25c7cf4b9e436Originally sold at Anthropologie

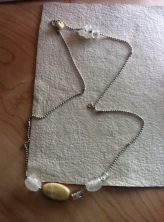
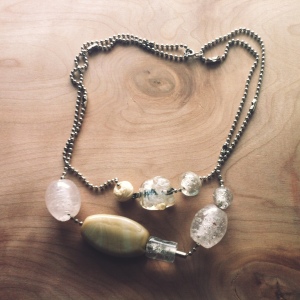
I had a small collection of clear and light neutral ceramic and glass beads that were between 1″-2″ inches. These all came together in a large bucket of beads I bought years ago, and just have not used. I also had some ball chain cord leftover from other projects. (You can find this chain at your hardware store for super cheap!) I measured out two lengths that I liked, so I could do the layered look. I strung the beads and added a clasp. My necklace is basically a very large circle of chain with beads on it, and a clasp that grasps another part of the chain in the back.

photo

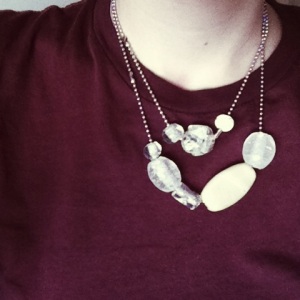
It turned out looking like this:

photo 1

photo 2

Its definitely not as formal and nice as the one from Anthro, but I will tell you this- it was a TON cheaper 😉 And it matches what I wear more often, which is usually more neutral, organic fabrics with jeans. I like how it turned out.

Have a joyful Friday!

Sarah

Hoops in the Hallway

20140114-221816.jpg

20140114-221835.jpg

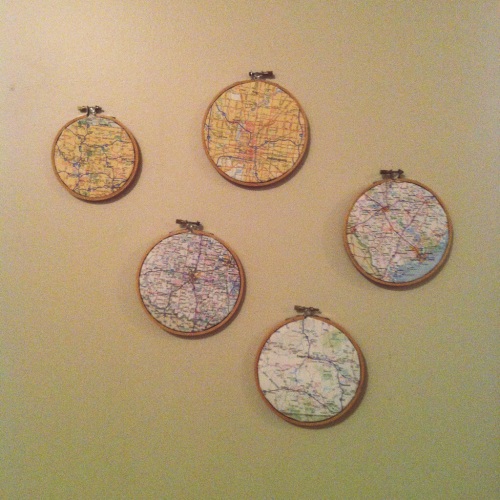
Recently I came across a very affordable atlas that was a newer version of the one we had. Our atlas had traveled from east to west umpteen times, was missing a few Midwest states, and also a Dakota, and many of the pages were torn or wrinkled. So when I found a new one for cheap, I snatched it.

I might have had the ulterior motive for map based projects prompting my purchase, but the hubs likes the new atlas anyway 😉

So now I found myself with an old book of well traveled maps and a wanting to display some of our favorite places. If you know me then you might know I have quite an affinity for maps.

Upon another thrifting trip I discovered some wooden embroidery hoops for way cheap and actually tried my hand at embroidery. I had my novice bits of threaded type on the wall for a while, but feeling the need for change I sought out something new.

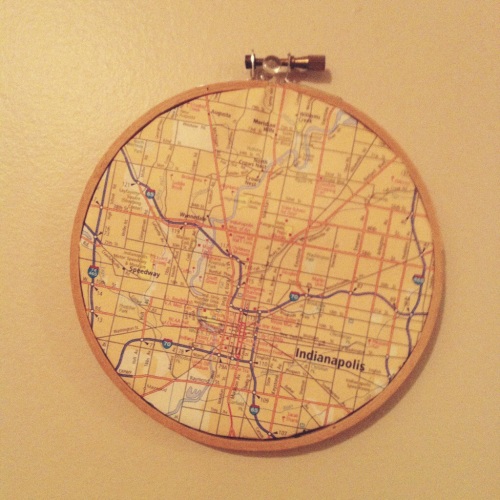
I took pages from the atlas, focusing on our favorite spots, and trimmed them to the size of the hoop. Then I carefully fit the hoop together around the page- so it wouldn’t rip. I cut out the circles with an extra wide margin so I’d be sure that they’d fit in the hoops without tearing or wrinkling– then I trimmed them with an exacto knife.

I love these embroidery hoops as a way to display patterned fabric or paper because I can change the display easily, and they fit on any spare spot of wall you have. Ours hang on a tiny section of wall in our hallway.

What would you come up with to display in an embroidery hoop? The possibilities are endless!

Sarah

Goodbye, 2013.

Well 2013, it’s been real. Here are some things you can just keep for yourself as we move into 2014. Prepare yourself for a touch of cynicism, and a little bit of “let’s be honest”.

1. The “I-Don’t-Need-No-Pants” Epidemic. 

I mean seriously come on people. Put on some NORMAL pants if you’re gonna go outside.

2. The Over-Opinionated, Judgmental Blog posts that circulate Facebook for a month.

You all know the ones I’m talking about.  (Oh, the irony 😉 ).

3. The Blatant Disregard for Taking Care of Your Body and Being Healthy. 

Feel beautiful in your skin, wear what makes you comfortable (and covered), and enjoy your life. Don’t lock yourself into insane dieting systems, but please don’t just dismiss a healthy lifestyle. Eating right and being active mean more for your body than just how you look.

4. Phone Addiction. 

Don’t answer a phone call during a meal with someone. Don’t look at your phone during a meal with someone. Don’t text at the movie theater. Don’t instagram while you’re laying in bed with your spouse. Don’t freak out when you can’t get service to post a video of yourself doing something. Just chill out. Remember the old days when we all had flip phones and were limited to 250 texts a month and life was so much simpler?

5. Dissing Your Family. 

I don’t care who you are. But if you’re gonna hate on your mamma or dad, you deserve a spankin’. They brought you in to this world, fool! I’ve seen so many commercials and comics about parents losing relationships with their kids because their kids are too focused on their social lives and their technology. This one bounces off the Phone Addiction- but seriously. Just call your parents. Spend time with them. I’ve learned so much from my mom and dad, and my in-laws that I wouldn’t trade for anything. Especially the high score on Angry Birds, or catching up with the latest show. Give them time, give them devoted, 100% of your attention. They deserve it. Don’t wait until you’re 27 (like some stupid stat says) to “learn to appreciate” them.

6. Ridiculous DIY’s. 

Check out  Pinterest Are You Drunk? for a good solid laugh. Oh man. My favorite is sawing through a Grand Piano. GOOD LUCK WITH THAT ONE!

7. Looking Up to Bad Role Models. 

I’m not going in to detail here, but oh my goodness.

8. Contouring. 

Please. Don’t put that much makeup on your face. PLEASE!!

9. The Bounty Paper Towel Commercials.

Okay, I’m not a parent yet, but I did nanny for almost 6 years for multiple families, so I know  a little bit about discipline. And every time I watch these commercials, where kids just spill junk all over the place and then everyone has a good laugh.. I’m sorry, what?! I don’t think its a good idea for a 5 year old to use an egg beater, or a 4 year old to carry hot soup across the floor, whilst spilling it every step. Yes, let your children help out in the kitchen! But the OCD cleaner  in me dies a little bit one of these kids continues to make a laughable mess. Please make it stop!

10. Hulu Plus Ads

Hey, Hulu. If you’re listening, I’d like to make a request. One- please stop taking down shows right when I’m in the middle of watching them. Figure out how to hold the rights for longer than 3 weeks. Some of us have lives and legitimately only watch one episode at a time, okay? And, while we’re at it. Why am I still seeing SO MANY ADS as a Hulu Plus member? I’m paying for you. Don’t show me commercials. Especially the same ones over and over and over and over again. That’d be so great if you could just get rid of those, Thanks.

11. Hatin’ on Marriage. 

Look, please just keep your hating on my wonderful life choice to yourself. I don’t want to see you post “omggg like everyones engaged or married. wahhh its so stupid.” on your Facebook or Twitter. And these ridiculously stupid articles that have gone viral about things to do before or instead of getting married? Come on. Not cool. All the married people don’t walk around saying, “omggggg all these single people… ew. so annoying!”  Maybe it’s because we’re happy and don’t need to put anyone down to make ourselves feel good. I don’t know. But why its suddenly become so popular to hate on? Lets just stop it, okay? We’re all adults here. If you’re not happy, find something that makes you happy! But don’t hate on anyone during that search process. And a side note, every adventure I’ve had has been that much better with my hubs by my side. 🙂

Hope you laughed. 🙂 Happy 2014!

Sarah